ZWave Add Device
Vera1
If the SAVE button in the upper left is red, click it to save your changes before you add new devices.
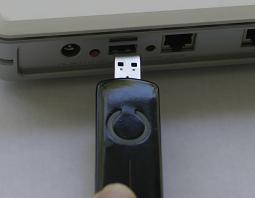
1. To add Z-Wave devices, first remove the Z-Wave dongle from the Home Gateway as shown.

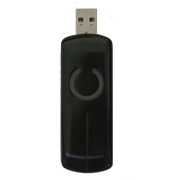
2. Tap the button on the Z-Wave dongle to put it in 'Include' Mode.
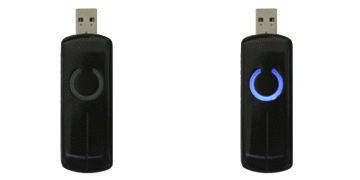
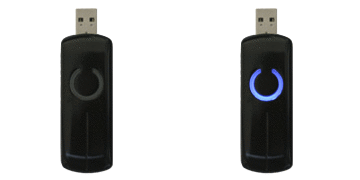
3. Carry the dongle with you as you activate all your Z-Wave devices. For lights, you generally activate them by turning the light on or off. Other Z-Wave devices will have an activate button. When you have successfully added a new Z-Wave device, the blue light on the dongle will stay on solid for 2 seconds. If you cannot add a Z-Wave device, then device was probably already added to another Z-Wave network and needs to be reset first, as explained here.
4. Once you have included all your Z-Wave devices, then reconnect the dongle to the Z-Wave Home Gateway.
5. When you reconnect the dongle, I will show you any new devices you added in the order you added them. You need to give them a descriptive name, like 'Black table lamp' and pick the room they are in. If you have a lot of Z-Wave devices to add, you can add them a few at a time so that when you go to give them names you do not have too many new devices at once. You can click the 'Add Z-Wave devices' button at any time to add new Z-Wave devices.
Note: If you're having trouble adding devices, those devices probably need to be reset, as here: troubleshooting. Also, if you have unsaved changes, meaning the save button in the upper left is RED, you won't see your new devices until you first save your changes.
Vera2
In Vera2 with UI4 there are two ways to add devices:
1. Power on Vera2 with the battery pack. Wait for the Z-Wave light on Vera2 to come solid and take Vera2 to the device you want to add/include/pair. On the back of the Vera2 unit is a small black button named Z-Wave. Press once that button and check if the Z-Wave light is blinking slow and steady. If it does that means that Vera2 is in include mode. The next step is to press the include button on the device. The Z-Wave light will flutter for a second or two (for special devices like door lock it will flutter for a longer period of time up to 5-8 seconds). After this repeat this process with other devices or connect Vera2 to your computer and access the dashboard. After a few seconds you will see the device that you included being configured.
NOTE: this is used mainly for devices that you cannot bring to Vera2 like wall switches, door locks, etc.
2. Click the Add/Remove Devices button from your dashboard. Choose Next on the desired category of devices (Z-Wave, Insteon, etc.) For Z-Wave devices you have to scroll down and from the dropdown menus select Include, one, any, full power and hit Go. The Z-Wave light will blink slow and steady. That means that Vera2 is in include mode. The next step is to press the include button on the device. The Z-Wave light will flutter for a second or two (for special devices like door lock it will flutter for a longer period of time up to 5-8 seconds). After this repeat this process with other devices. After the process is completed go to the dashboard where you will see your device configuring.


