ICamView
From MiOS
(Difference between revisions)
| Line 7: | Line 7: | ||
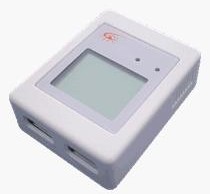
[http://icamview.co.uk/iCVPRO.htm iCamView] camera server allows to connect up to two compatible iCamView cameras, USB hubs, storage device for local storage, compatible Wi-Fi USB adapters, etc | [http://icamview.co.uk/iCVPRO.htm iCamView] camera server allows to connect up to two compatible iCamView cameras, USB hubs, storage device for local storage, compatible Wi-Fi USB adapters, etc | ||
| − | ''' | + | == UI5 Installation Instructions == |
| + | |||
| + | * Install the app from the Vera UI >> ''Apps'' >> ''Install Apps''. | ||
| + | * After the app is installed open the newly created device's control panel >> ''Advanced'' tab and enter the IP of the iCamView server in the ''ip'' field. | ||
| + | * Save | ||
| + | |||
| + | |||
| + | == UI4 Installation Instructions == | ||
To install follow the simple steps: | To install follow the simple steps: | ||
Latest revision as of 15:24, 18 June 2012
NOTE: these instructions are for UI4.
iCamView camera server allows to connect up to two compatible iCamView cameras, USB hubs, storage device for local storage, compatible Wi-Fi USB adapters, etc
[edit] UI5 Installation Instructions
- Install the app from the Vera UI >> Apps >> Install Apps.
- After the app is installed open the newly created device's control panel >> Advanced tab and enter the IP of the iCamView server in the ip field.
- Save
[edit] UI4 Installation Instructions
To install follow the simple steps:
- Download I_ICamView.xml from the link below
- Upload I_ICamView.xml on Vera
- Create a new Luup device using existing device D_DigitalSecurityCamera1.xml
- In the new device go to Advanced settings and populate UpnpImplFilename field with I_ICamView.xml
- Fill IP field with IP address of your iCamView server
- Check field Camera - it contains the number of your camera on the server. Default value is 1, change it to 2 if the device is for the second camera
- Save
Download iCamView plugin
