Dashboard
m |
|||
| (3 intermediate revisions by 2 users not shown) | |||
| Line 1: | Line 1: | ||
The Vera Dashboard is the primary interface used to program Vera and can also be used as a controller. The explanations below refer to various versions of the dashboard, and refer to the User Interface version (UI Version). The current version of the dashboard available from Mi Casa Verde is UI5.<br> | The Vera Dashboard is the primary interface used to program Vera and can also be used as a controller. The explanations below refer to various versions of the dashboard, and refer to the User Interface version (UI Version). The current version of the dashboard available from Mi Casa Verde is UI5.<br> | ||
| − | == | + | == UI5 == |
| − | The | + | Your day to day operation of Vera is done using the dashboard. All the basic controls and system statuses for your devices are found in the Dashboard. The icons in your toolbar, and the 'setup' icon to each device allows you control over more advanced setup options. The Vera market is where you add plugins or apps to perform a multitude of functions, such as controlling alarm panels and monitoring the weather. It's available in Apps/Install Apps. You can download them directly from there of you can go to apps.mios.com. There are help icons scattered throughout the Dashboard area. These are context-sensitive and will always take you to the relevant section of the User's Manual. |
| − | + | For more information about UI5, please visit: | |
| − | + | [http://docs5.mios.com/doc.php http://docs5.mios.com/doc.php] | |
| + | <br> | ||
| + | == UI4 == | ||
| − | + | The Setup Wizard is how you tell MiOS which devices you want to control, how you want to automate them with scenes, and when you want to be notified of events. The Setup Wizard is simple enough for the most basic user with no home automation experience. Step by step, it guides you through adding basic devices like light switches, thermostats, door locks, and so on, and creating simple scenes. It can take as little as a few minutes to complete the setup wizard if you only have a few devices to control. | |
| − | [[Image: | + | <br> [[Image:Wizard step1.png|thumb|right|700px]] |
| − | + | Once you have completed the setup wizard you do not need to use the wizard again unless you want to make changes.The day-to-day operation of MiOS is done using the dashboard, or with one of several apps available for iOS and Android. All the basic controls for your devices are on this one page, as is the system status. The icons in your toolbar, and the 'setup' icon next to each device let's you dive more deeply into advanced setup options. The MiOS market is where you add plugins, or apps, to do all sorts of things, like control alarm panels and monitor the weather. <br> [[Image:Dashboard overview.png|thumb|right|700px]] <br> There are help icons '''?''' scattered throughout. These are context sensitive so they will always take you to the relevant part of the User's manual. | |
| − | + | <br> | |
| − | + | <br> | |
| − | + | <br> | |
<br> | <br> | ||
| + | <br> | ||
| + | <br> | ||
| + | <br> | ||
| + | <br> | ||
| + | <br> | ||
| + | <br> | ||
| − | + | <br> | |
| − | + | <br> | |
| − | + | <br> | |
| − | + | <br> | |
| − | + | <br> | |
| − | + | <br> | |
| − | + | <br> | |
| − | + | <br> | |
<br> | <br> | ||
| Line 63: | Line 71: | ||
<br> | <br> | ||
| − | + | <br> | |
| − | + | == UI2 == | |
| − | + | The first time you access Vera you will see Vera's 'Setup' page, as explained in the [[Quick Start|Quick Start Guide]]. Once Vera is setup, you will instead see the Dashboard. The Dashboard is a simple control panel that shows you the rooms in your home, and all the scenes and devices in those rooms. | |
| − | + | Click the 'Go' button next to a scene to execute that scene, or click one of the control buttons next to a device to control that device. | |
| − | < | + | === <u>'''Icons'''</u> === |
| − | + | [[Image:OFF 2.gif]] [[Image:CONFIG 4.gif]] [[Image:Buonnormal.gif]] [[Image:Buautonormal.gif]] For an explanation of the icons, see: [[Device Control Status|device control and status]]. | |
| − | + | [[Image:Dashboard1.jpg|thumb|right|700px]] | |
| − | <br> | + | <br> You can also click the 'setup' button to go back to the 'Setup' page. |
| − | <br> | + | [[Image:Setup1.jpg|thumb|right|700px]] <br> |
| − | <br> | + | <br> <br> <br> <br> <br> <br> |
| − | <br> | + | <br> <br> |
<br> | <br> | ||
| Line 93: | Line 101: | ||
<br> | <br> | ||
| − | <br> | + | <br> <br> |
| − | <br> | + | <br> <br> |
| − | <br> | + | <br> <br> |
| − | <br> | + | <br> <br> |
| − | <br> | + | <br> <br> |
| − | <br> | + | <br> <br> |
| − | <br> | + | <br> <br> |
| − | <br> | + | <br> <br> |
<br> | <br> | ||
| Line 128: | Line 136: | ||
<br> | <br> | ||
| − | |||
| − | |||
| − | |||
| − | |||
[[Category:Glossary]] | [[Category:Glossary]] | ||
Latest revision as of 19:24, 20 March 2012
The Vera Dashboard is the primary interface used to program Vera and can also be used as a controller. The explanations below refer to various versions of the dashboard, and refer to the User Interface version (UI Version). The current version of the dashboard available from Mi Casa Verde is UI5.
Contents |
[edit] UI5
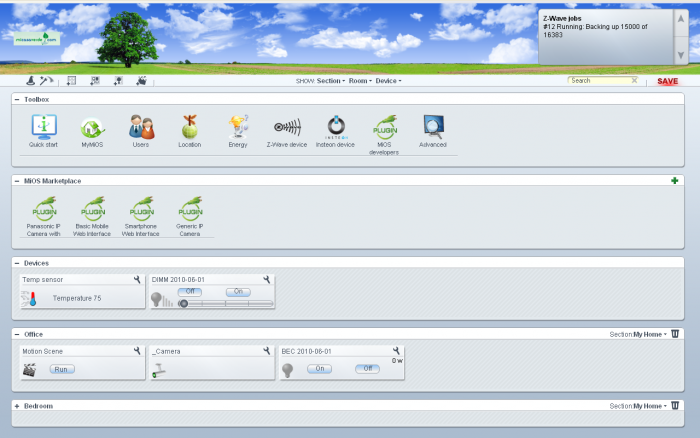
Your day to day operation of Vera is done using the dashboard. All the basic controls and system statuses for your devices are found in the Dashboard. The icons in your toolbar, and the 'setup' icon to each device allows you control over more advanced setup options. The Vera market is where you add plugins or apps to perform a multitude of functions, such as controlling alarm panels and monitoring the weather. It's available in Apps/Install Apps. You can download them directly from there of you can go to apps.mios.com. There are help icons scattered throughout the Dashboard area. These are context-sensitive and will always take you to the relevant section of the User's Manual.
For more information about UI5, please visit:
[edit] UI4
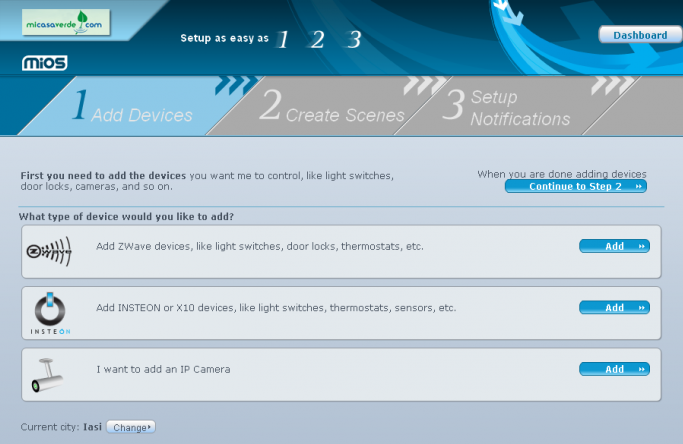
The Setup Wizard is how you tell MiOS which devices you want to control, how you want to automate them with scenes, and when you want to be notified of events. The Setup Wizard is simple enough for the most basic user with no home automation experience. Step by step, it guides you through adding basic devices like light switches, thermostats, door locks, and so on, and creating simple scenes. It can take as little as a few minutes to complete the setup wizard if you only have a few devices to control.
Once you have completed the setup wizard you do not need to use the wizard again unless you want to make changes.The day-to-day operation of MiOS is done using the dashboard, or with one of several apps available for iOS and Android. All the basic controls for your devices are on this one page, as is the system status. The icons in your toolbar, and the 'setup' icon next to each device let's you dive more deeply into advanced setup options. The MiOS market is where you add plugins, or apps, to do all sorts of things, like control alarm panels and monitor the weather.
There are help icons ? scattered throughout. These are context sensitive so they will always take you to the relevant part of the User's manual.
[edit] UI2
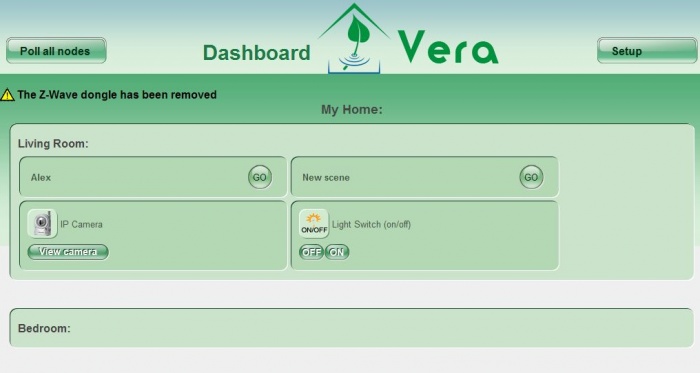
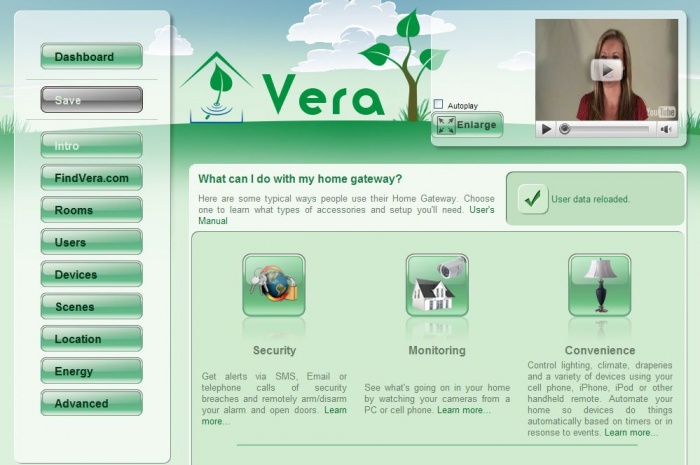
The first time you access Vera you will see Vera's 'Setup' page, as explained in the Quick Start Guide. Once Vera is setup, you will instead see the Dashboard. The Dashboard is a simple control panel that shows you the rooms in your home, and all the scenes and devices in those rooms.
Click the 'Go' button next to a scene to execute that scene, or click one of the control buttons next to a device to control that device.
[edit] Icons
![]()
![]()
![]()
![]() For an explanation of the icons, see: device control and status.
For an explanation of the icons, see: device control and status.
You can also click the 'setup' button to go back to the 'Setup' page.


